
A braiser pan for beginners on a budget should make searing, simmering, and one-pan dinners easier without demanding expensive equipment. The best starter model offers a broad base, secure lid, manageable weight, and forgiving maintenance. This guide shows how to compare affordable materials, choose a sensible size, and cook confidently.
What beginners should look for in an affordable braiser
A braiser should simplify cooking rather than introduce unnecessary technical challenges. Its primary functions are to brown ingredients in a broad vessel and finish them gently with moisture under a lid. Beginners benefit most from practical construction, comfortable handles, and a size that matches ordinary recipes.
Understand what separates a braiser from a Dutch oven
A braiser and a Dutch oven can perform some of the same cooking tasks, but their shapes emphasize different techniques. Braisers are generally wide and shallow, while Dutch ovens have taller walls and more enclosed volume. Knowing this distinction helps beginners avoid buying cookware that does not suit their preferred meals.
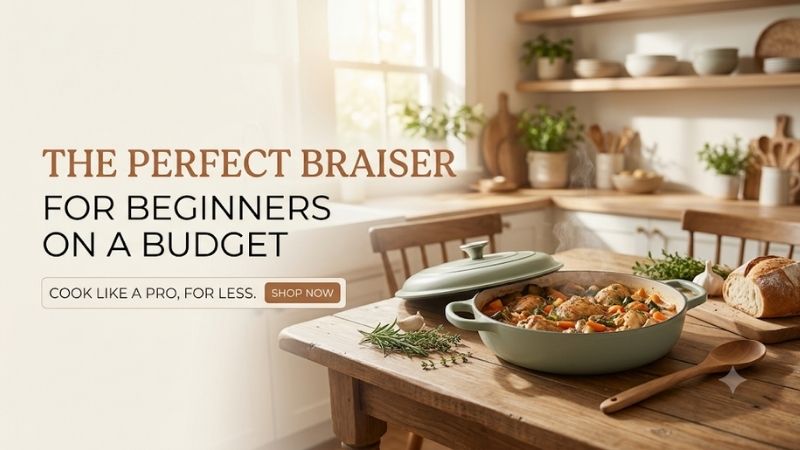
The broad base of a braiser provides useful room for searing.
When chicken thighs are placed in a single layer, more of their surface can contact the hot cooking area.
This encourages browning and reduces the need to cook several small batches.
The relatively shallow walls also make turning ingredients easier.
Once the food develops color, the cook adds a modest quantity of liquid and covers the vessel.
The lid helps retain moisture during the slower finishing stage.
A Dutch oven can also braise food, but its taller shape is better suited to soups, stews, and recipes requiring substantial liquid.
A shallow braiser is particularly convenient for chicken, short ribs, pork chops, and hearty vegetables.
However, not every recipe requires a dedicated braiser.
A deep sauté pan with a fitted oven-safe lid can accomplish many similar tasks.
This is important for budget-conscious buyers.
Before purchasing another piece of cookware, examine whether an existing covered skillet already provides enough cooking space.
A dedicated braiser becomes worthwhile when wide-base cooking and covered oven finishing are frequent parts of the household routine.
Choose affordable materials without sacrificing safety
Budget braisers are available in enameled cast iron, stainless steel, and other metal constructions. Each material has advantages, but the best choice depends on cooking frequency and willingness to maintain the surface. Beginners should prioritize dependable construction and safe handling before considering decorative finishes.
Enameled cast iron is popular because it retains heat and does not require traditional seasoning.
Its protective coating also makes it convenient for ordinary acidic ingredients such as tomatoes and wine.
However, enamel can chip if mishandled, and the vessel may be heavy.
A stainless steel sauté pan with a lid can provide a lighter alternative.
Fully clad stainless steel designs use conductive materials to support heat distribution.
They are suitable for many braising recipes, though they may offer a different heating experience from cast iron.
Budget cookware can also use disc-bottom construction, concentrating conductive material beneath the cooking surface.
This may be sufficient for liquid-heavy dishes.
However, very thin cookware may develop localized hot spots and require closer attention when browning.
Beginners should inspect handle attachments, lid fit, and manufacturer temperature limits.
A low price does not compensate for an unstable handle or incompatible stove base.
The most practical material is one that the buyer can clean, maintain, and operate confidently.
Prioritize cooking space over maximum capacity
A large advertised capacity does not guarantee that a braiser can brown several pieces of meat effectively. Its usable flat cooking area matters more during the initial stage, while overall volume becomes important after vegetables and liquid are added. Beginners should compare both measurements before buying.
A three-quart braiser may be sufficient for one or two people preparing modest portions.
A 3.5- or four-quart model provides greater flexibility for family meals.
However, two braisers with identical capacities may have different base widths and sidewall heights.
One may accommodate four chicken thighs comfortably, while another requires cooking in batches.
For successful searing, ingredients need room for moisture to evaporate.
Crowding the cooking surface encourages steaming and reduces browning.
A wider base can therefore be more useful than additional height.
However, large cookware requires an appropriate burner.
A 12-inch braiser placed over a very small heating zone may develop a hot center and cooler edges.
This can create uneven cooking, particularly during searing.
Also consider storage.
A broad cast iron braiser can occupy more cabinet space than a taller Dutch oven of similar volume.
Beginners should select a size that accommodates their ordinary meals rather than the largest occasional gathering.
For many small households, a three- or 3.5-quart vessel provides a sensible balance.
How to choose a braiser pan for beginners on a budget
A budget purchase should solve real cooking problems without introducing unnecessary expense. The most important factors are total price, included accessories, durability, and whether the cookware can be used on the household’s stove. Comparing these features helps beginners distinguish genuine value from attractive but impractical designs.
Set a realistic spending range for starter cookware
Affordable braisers range from basic covered sauté pans to enameled cast iron models with traditional shapes. Buyers should evaluate the total cost of obtaining a usable cooking setup rather than comparing only the initial pan price. A lid, suitable handles, and stove compatibility are essential.
A budget of approximately $50–$100 may provide several practical options, depending on retailer availability and promotions.
At the lower end, a covered stainless steel or aluminum sauté pan may be more realistic than premium enameled cast iron.
Some budget enameled braisers also enter this range during promotions.
The Lodge Essential Enamel collection is an example of cookware positioned below many luxury competitors.
However, current prices can change substantially.
Compare the total purchase cost, including shipping and any necessary accessories.
A braiser sold without a lid may require another purchase.
A heavy cast iron model may also benefit from suitable protective mitts and storage equipment.
Do not spend the entire budget on decorative features.
The cooking surface, lid fit, and handle construction are more important.
An inexpensive pan that is uncomfortable to lift may rarely be used.
Likewise, a premium model does not automatically produce better results for a beginner.
The most economical purchase is the one that supports normal meals without requiring immediate replacement or additional equipment.
Compare budget enameled cast iron with stainless steel
Enameled cast iron and stainless steel are both useful for braising, but their prices, weights, and heating behavior differ. Beginners should decide which compromises fit their routine. A less expensive stainless steel pan may offer better overall value when it is also needed for ordinary sautéing.
Enameled cast iron retains heat effectively once thoroughly warmed.
This can be useful when browning meat and moving the vessel into the oven.
The enamel also protects the iron from ordinary moisture exposure and removes the need for seasoning.
However, cast iron is heavy.
A large braiser containing several portions of food can be difficult to lift safely.
Stainless steel is often lighter, especially in smaller covered sauté pans.
It can also be suitable for acidic sauces and ordinary cleaning without special seasoning routines.
However, stainless steel does not offer the same thermal mass as substantial cast iron.
This changes how the pan responds when cold ingredients are introduced.
Neither material is automatically better for tenderness.
A successful braise depends mainly on appropriate temperature, moisture, and cooking time.
For someone who already owns a Dutch oven, a stainless steel sauté pan may expand kitchen versatility without duplicating equipment.
For a household without any covered oven-safe cookware, an enameled cast iron braiser can be an attractive multipurpose investment.
Choose according to actual cooking habits rather than tradition alone.
Check lids, handles, and oven temperature ratings
A braiser’s lid and handles are essential to its intended function. A poorly fitting lid can allow excess moisture to escape, while weak or uncomfortable handles make lifting dangerous. Beginners should check the complete cookware assembly rather than focusing only on the cooking vessel.
The lid should fit securely enough for controlled simmering.
However, braising does not require a completely airtight vessel.
Some steam may escape, and liquid should still be monitored.
Solid cast iron lids are durable and retain heat, but they add substantial weight.
Glass lids allow visual monitoring and can be convenient for beginners.
However, glass may have different oven-temperature limits from the pan.
A metal lid knob can also have its own rating.
Always follow the lowest applicable temperature limit.
Handles should provide enough space for a secure grip with oven mitts.
Wide loop handles can make a heavy braiser easier to move using both hands.
A long handle may provide leverage but increase storage requirements.
Inspect whether the handle is integral to the pan or attached through rivets or other fittings.
Neither construction is universally superior, but the connection should be secure.
Before buying, check whether the entire pan fits inside the oven.
A wide braiser with handles may occupy more space than expected.
These practical details matter more than decorative packaging.
Beginner braising techniques that improve results
Learning to braise does not require advanced culinary training, but the method includes several stages that serve different purposes. Browning develops flavor, liquid helps distribute heat and moisture, and gentle cooking tenderizes suitable ingredients. Understanding each step makes an affordable braiser more useful.
Start with simple chicken and vegetable recipes
Chicken thighs are a practical introduction to braising because they are widely available and generally forgiving. A simple recipe can demonstrate the relationship between searing, aromatic vegetables, liquid, and covered cooking without requiring expensive ingredients or specialized equipment.
Begin by choosing bone-in or boneless chicken thighs according to the recipe.
Pat the surface dry before seasoning.
Excess moisture interferes with browning because the pan must evaporate water before a crust can develop.
Warm the braiser gradually over moderate heat.
Add a suitable amount of cooking fat.
Place the chicken in a single layer without crowding the pan.
Allow it to brown before turning.
Remove the pieces temporarily if the recipe requires additional vegetables.
Add onions, carrots, garlic, or other aromatics and cook until their flavors develop.
Pour in a modest quantity of stock or another appropriate liquid.
Use a spatula to release browned residue from the cooking surface.
Return the chicken and cover the vessel.
Finish the dish using the recipe’s recommended oven or stovetop method.
Use a food thermometer to confirm appropriate doneness.
The result should be tender, flavorful, and supported by a sauce that incorporates the browned ingredients.
This simple method teaches the core braising process without requiring a premium pan.
Control moisture instead of turning every braise into stew
One of the most common beginner mistakes is adding so much liquid that the ingredients become fully submerged. While this can produce a successful stew, braising typically uses a more controlled quantity of liquid. The goal is to combine moist cooking with some exposure to the environment above the liquid.
Begin by reading the recipe carefully.
For many braised meat dishes, the liquid reaches only partway up the food.
The exact level depends on the ingredient, cooking vessel, and intended texture.
A shallow braiser makes this relationship easier to observe.
Once covered, moisture circulates through steam and condensation.
However, a lid does not guarantee that the liquid level remains constant.
Some evaporation can still occur, especially during extended cooking.
Check the dish when appropriate and add more liquid if necessary.
Avoid opening the lid repeatedly without a reason.
Frequent uncovering releases heat and moisture.
For recipes that require sauce reduction, remove the lid toward the end when instructed.
This allows excess liquid to evaporate and concentrates flavor.
Do not compensate for excessive liquid by using aggressively high heat throughout cooking.
Gentle, controlled heat is usually more appropriate for braised meats.
Understanding moisture management is often more valuable than buying expensive cookware.
Use moderate heat and sufficient cooking time
Braising depends on controlled heat and time rather than maximum burner power. Certain cuts of meat become tender as connective tissue changes during prolonged cooking, while vegetables require shorter times to prevent them from becoming excessively soft. Beginners should learn to recognize the difference.
After searing, reduce the heat or transfer the covered braiser to the oven.
The cooking environment should support a gentle simmer rather than vigorous boiling.
Excessive heat can cause liquid to evaporate rapidly.
It may also produce uneven texture or toughen certain ingredients.
A substantial cast iron braiser retains heat after the burner is lowered, so adjustments may take time to affect the contents.
Do not repeatedly increase and decrease the heat in response to small changes.
Use the recipe’s recommended range as a starting point.
However, cooking time varies with the size and composition of the ingredients.
A thick cut containing connective tissue may need considerably longer than boneless chicken thighs.
Vegetables also differ.
Carrots and potatoes tolerate longer cooking than delicate leafy greens.
Add ingredients at appropriate stages when their cooking requirements vary.
Tenderness can be evaluated through texture, while food-safety temperatures should be checked with a thermometer when necessary.
Good braising involves patience and observation.
A reliable budget pan can produce excellent results when the technique is sound.
Maintenance and long-term value for beginner cooks
Affordable cookware becomes a worthwhile investment when it is used regularly and maintained correctly. Braisers can last for years, but their surfaces and accessories require appropriate handling. Beginners should understand basic cleaning, storage, and replacement considerations before making a purchase.
Clean enamel without creating unnecessary damage
Enameled cast iron simplifies maintenance because it does not require traditional seasoning. However, its protective coating can still be damaged through aggressive scraping, severe impacts, or sudden temperature changes. Gentle cleaning helps preserve the cookware and reduces the need for premature replacement.
Allow the pan to cool enough for safe handling.
Avoid placing an extremely hot braiser directly into cold water.
For ordinary residue, use warm water, mild dish soap, and a soft sponge.
Food that has adhered during searing may require soaking.
Follow the manufacturer’s instructions for stubborn deposits.
Avoid abrasive cleaning products when they could damage the enamel.
Some cookware is dishwasher-safe, but handwashing may preserve the finish more effectively.
Inspect the areas around handles and lid rims for residue.
These locations can collect grease during covered cooking.
After washing, dry the pan before storage.
Enameled interiors may develop discoloration through repeated cooking.
Light staining does not automatically mean the surface has failed.
However, significant chips or exposed sharp areas require attention.
A simple cleaning routine is more valuable than aggressive attempts to restore a permanently pristine appearance.
Protect the pan during storage and daily handling
Braisers are often wide and heavy, so careless storage can damage neighboring cookware or create safety risks. A stable cabinet arrangement makes the pan easier to retrieve and protects delicate enamel surfaces. Buyers should plan where the braiser will live before purchasing it.
Measure the cabinet width and depth, including the lid and handles.
A shallow braiser may occupy more horizontal space than a taller Dutch oven.
Store heavy cookware on shelves designed to support the load.
Lower cabinets are often preferable to high shelves when lifting substantial cast iron.
Avoid placing a heavy braiser on top of unstable lightweight cookware.
When stacking compatible pieces, use appropriate protective separators.
A lid may be stored separately to reduce the overall height.
However, it should remain stable and protected from impacts.
Do not assume decorative enamel is scratchproof.
Contact with other metal items can cause cosmetic damage.
For daily cooking, keep the braiser accessible enough that it is not inconvenient to retrieve.
Cookware that requires reorganizing an entire cabinet before each meal may be used less frequently.
Practical storage is part of long-term value.
Recognize when a covered sauté pan is the smarter purchase
A dedicated cast iron braiser is attractive, but beginners may not need one immediately. A deep sauté pan with a properly fitting oven-safe lid can perform many similar tasks. Comparing the equipment already available helps avoid unnecessary spending and storage problems.
A stainless steel sauté pan can brown chicken, cook vegetables, and simmer covered dishes.
It may be lighter than cast iron and easier to clean.
If the household already owns such a pan, learning basic braising techniques may not require another purchase.
However, the pan must be suitable for the intended oven temperature.
Check the handle and lid restrictions carefully.
A shallow braiser becomes more attractive when the cook frequently prepares wide, covered dishes.
Its broad cooking surface can provide additional space for browning.
The traditional cast iron body also offers substantial heat retention.
However, these advantages matter only when they improve normal recipes.
A beginner preparing braised chicken once per month may obtain excellent results using existing cookware.
A household preparing slow-cooked meats several times per week may find a dedicated braiser worthwhile.
The most economical choice is not automatically the least expensive item.
It is the cookware that genuinely improves cooking without unnecessary duplication.
Understand the hidden costs of premium cookware
A premium braiser may offer refined enamel, distinctive styling, and carefully finished handles, but higher prices do not eliminate basic cooking responsibilities. Beginners should compare long-term ownership costs with the actual benefits of premium features before committing to an expensive purchase.
Luxury enameled cast iron can cost several times more than accessible alternatives.
The additional expense may reflect manufacturing location, finishing, brand reputation, and warranty support.
However, a higher price does not guarantee better results for every recipe.
A budget braiser can produce tender chicken or flavorful short ribs when used correctly.
The user still needs suitable ingredients, appropriate heat, and sufficient cooking time.
Storage accessories may also add to ownership costs.
Heavy cookware may require cabinet organizers or protective separators.
A large braiser can be difficult to wash in a small sink.
Consider whether the pan is comfortable to lift when full.
If its weight creates practical difficulties, a lighter stainless steel alternative may provide better everyday value.
Warranty coverage should also be examined.
Understand what types of damage are included and whether ordinary cosmetic wear is excluded.
For beginners, a well-constructed affordable braiser is often a smarter starting point than a luxury model.
Experience can guide future upgrades when meaningful limitations become apparent.
Conclusion
The best braiser pan for beginners on a budget has a broad cooking base, secure oven-compatible lid, comfortable handles, and a size that matches normal household meals. A three- or 3.5-quart enameled cast iron model is a useful starting point for many cooks, while a covered stainless steel sauté pan may be more economical when it serves multiple purposes. Prioritize reliable construction and straightforward maintenance, then develop basic browning and gentle braising techniques before considering premium upgrades.


Write Your Review
No reviews yet. Be the first to share your experience!